Mastering the Art of Gluten-Free Sourdough Bread at Home

Understanding the Science Behind Gluten-Free Sourdough
Traditional sourdough relies on gluten networks to trap fermentation gases and create structure. Without gluten, sourdough requires a fundamentally different approach to hydration, binding, and fermentation management. The absence of gluten means starches must perform structural duties, which demands precise hydration ratios and the inclusion of hydrocolloids like xanthan gum or psyllium husk.
Psyllium husk emerges as the superior binding agent for gluten-free sourdough. When hydrated at a 1:9 ratio (10 grams psyllium to 90 grams water), psyllium creates a gel matrix that mimics gluten's extensibility. King Arthur Baking Company conducted trials in 2023 demonstrating that psyllium-based loaves achieved 40% better oven spring compared to xanthan gum alternatives.
Building Your Flour Foundation
Single-flour sourdough produces disappointing results in gluten-free baking. A strategic blend distributes protein, starch, and flavor profiles across multiple sources. The following ratio has produced consistent results in professional test kitchens:
- Brown rice flour (40%): Provides mild flavor and stable starch structure. Authentic Foods Superfine Brown Rice Flour offers the finest milling, creating smoother crumb texture.
- Sorghum flour (25%): Contributes protein content (approximately 11 grams per 100 grams) and subtle sweetness. Bob's Red Mill Sorghum Flour maintains consistent protein levels batch to batch.
- Tapioca starch (20%): Adds chewiness and helps retain moisture during baking.
- Millet flour (15%): Introduces earthy notes and additional protein without bitterness.
This blend yields approximately 12.5% protein content when measured precisely. Protein percentage directly correlates with fermentation stability—lower protein blends (below 10%) collapse during extended proofing periods.
The Starter: Cultivating Your Living Ingredient
Gluten-free sourdough starters require different feeding ratios than wheat-based cultures. The recommended maintenance protocol uses a 1:2:2 ratio (starter:flour:water) every 24 hours at room temperature (68-72°F).
For initial starter creation, combine 50 grams brown rice flour with 50 grams filtered water in a glass container. Cover with breathable cloth and let rest 48 hours. Feed every 24 hours thereafter, discarding all but 20 grams of starter before each feeding. Within 7-10 days, the starter should double in volume within 4-6 hours of feeding, indicating adequate yeast activity.
Target starter acidity matters. pH strips should read between 3.5 and 4.0 at peak activity. Lower pH (below 3.5) produces overly sour bread with compromised rise. Higher pH (above 4.5) indicates under-fermentation and weak leavening power.
Storage Protocols
Active starters maintained at room temperature require daily feeding. For bakers producing bread weekly, refrigerator storage extends feeding intervals to 7 days. Before refrigeration, feed the starter and allow 2 hours of room-temperature activity. Store in a sealed glass container. Reactivation requires 2-3 feedings at room temperature before the starter achieves full leavening strength.
Mixing and Fermentation Methodology
The following formula produces one 900-gram loaf:
- Levain preparation (8-10 hours before mixing): Combine 30 grams active starter, 60 grams brown rice flour, and 60 grams water at 78°F. Cover and rest until doubled in volume.
- Psyllium gel (prepare immediately before mixing): Whisk 15 grams whole psyllium husk into 240 grams warm water (105°F). Let stand 5 minutes until thickened to egg-white consistency.
- Final dough: Combine 400 grams flour blend, 280 grams water, all prepared levain, psyllium gel, 10 grams sea salt, and 15 grams olive oil.
Mix by hand or stand mixer with dough hook for 3-4 minutes until uniform. The dough should resemble thick cake batter rather than traditional bread dough—this consistency indicates proper hydration.
Bulk Fermentation
Transfer dough to an oiled container marked with volume measurements. Bulk fermentation occurs at 76-78°F for 3-4 hours, or until volume increases by 50%. Unlike wheat dough, gluten-free sourdough cannot tolerate doubling in volume—over-fermentation causes collapse during baking.
Perform one stretch-and-fold at the 90-minute mark. Wet hands thoroughly before handling dough to prevent sticking. Fold from four compass points, then return to container.
Shaping and Final Proofing
Gluten-free sourdough requires vessel-supported shaping. Bannetons lined with rice flour-dusted cloth work excellently. For sandwich-style loaves, use a 9x5-inch Pullman pan lined with parchment.
Transfer dough directly from bulk fermentation container to prepared vessel—no preshaping required. Smooth surface with wet spatula or oiled hands. Cover with damp cloth or shower cap.
Final proofing duration ranges 1.5-2.5 hours at 76°F, or overnight (8-12 hours) at 55-60°F in a wine refrigerator or cool basement. The dough should increase in volume by 30-40% and pass the poke test: a floured finger pressed ½-inch into the dough should leave an indentation that springs back halfway.
Baking Technique and Temperature Protocol
Preheat oven to 450°F with Dutch oven or covered baking vessel inside for 45 minutes. Steam generation proves critical for gluten-free sourdough—dry baking environments produce thick, leathery crusts that trap moisture inside, creating gummy crumb structure.
Transfer proofed dough (still in parchment) into preheated Dutch oven. Score surface with lame or sharp razor at 45-degree angle, cutting ¼-inch deep. Cover immediately.
Baking schedule:
- 0-25 minutes: Covered at 450°F. Internal steam creates oven spring and sets crust structure.
- 25-50 minutes: Uncovered, reduce to 425°F. Crust develops color and crispness.
- Final 5-10 minutes: Optional—remove from vessel and bake directly on stone or rack for maximum crust thickness.
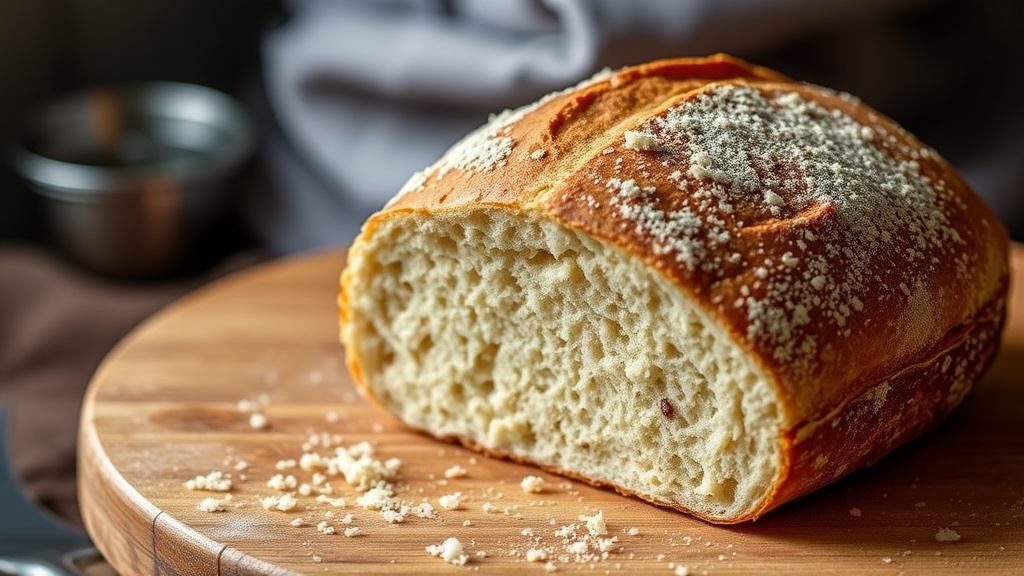
Internal temperature must reach 208-210°F for full doneness. Gluten-free breads require higher internal temperatures than wheat breads to gelatinize starches completely.
Cooling and Storage
Resist slicing for minimum 4 hours—preferably 6-8 hours. Gluten-free sourdough continues cooking internally as it cools. Premature slicing releases steam and produces gummy, dense crumb structure.
Storage options by duration:
- 24-48 hours: Paper bag at room temperature. Plastic bags create condensation and mold growth.
- 3-7 days: Refrigerate in sealed container. Toast slices to restore texture.
- 1-3 months: Slice and freeze in airtight bags. Thaw at room temperature or toast from frozen.
Troubleshooting Common Failures
Dense, gummy crumb: Indicates underbaking or premature slicing. Verify internal temperature reaches 208°F with instant-read thermometer. Extend cooling period to 8 hours.
Collapsed center: Results from over-fermentation during bulk or final proof. Reduce proofing time by 30 minutes or lower ambient temperature.
Excessive sour flavor: Starter pH below 3.5. Refresh starter with double feeding (1:4:4 ratio) for 2-3 cycles before baking.
Cracked, uneven crust: Insufficient steam during initial baking phase. Ensure Dutch oven preheating time exceeds 45 minutes and avoid peeking during covered phase.
No oven spring: Starter lacking activity or dough over-proofed. Verify starter doubles within 6 hours of feeding. Reduce final proof by 30-45 minutes.
Equipment Recommendations
Precision tools separate successful gluten-free sourdough from disappointing experiments:
- Digital scale: Escali Primo Digital Scale measures to 1-gram increments. Volume measurements produce inconsistent results in gluten-free baking.
- pH strips: Micro Essential Laboratory pH strips (range 0-14) monitor starter acidity for optimal flavor development.
- Thermometer: ThermoWorks Thermapen ONE provides 1-second temperature readings for water, dough, and internal bread temperatures.
- Dutch oven: Lodge 5.5-quart enameled cast iron Dutch oven retains heat and generates sufficient steam.
- Proofing box: Brod & Taylor Folding Proofer maintains 76-78°F consistently, eliminating ambient temperature variables.
"Gluten-free sourdough rewards precision and punishes approximation. Every gram matters, every degree matters, every minute matters. The result—crusty, aromatic, properly structured bread—justifies the meticulous approach."
Begin with the formula provided, document results, and adjust hydration ±5% based on local humidity and specific flour absorption rates. Consistent practice yields bread that satisfies both nutritional requirements and culinary standards.